I was always crap at impov in college (music major here!). I had to learn to do it and I understood the concept of it. Nearly every time, I froze up or it was totally boring or I wasn’t happy with what I did. I’m not gonna lie, fear of playing something completely awful dominated my experience around it. (One prof told me I would be fine if I just got out of my head… and another prof told me I would be find if I just came to a lesson after a few drinks!! gotta love old jazz guys – they have no filter). Once it was out there, there was no taking it back and if it was total crap, it was forever total crap.
Some knitters have this same fear with their knitting and deviating from a pattern. Amazingly, I’ve never really had that fear. Deviations could work or not work and all I had to do was rip it out and try it again. (This is what lifelines are for!) Nothing in my knitting has to stay ‘forever total crap’ if I want to fix it.
When I bought this lovely yarn, the idea was to knit Tin Can Knits’ Windswept. It’s a lovely yarn, this is a lovely sweater; together, it will be lovely! But I hit a few snags, and it had me re-thinking this plan. After some further project stalking, it seemed this sweater looked great on a specific body type (that wasn’t my body type). So I frogged what I had done, the yarn went back into the bag and into stash purgatory.
 |
| Au revoir, pretty yarn! |
It was in purgatory for over a year when I got the itch to knit it again. I actually kept coming back to a pattern by the same designer, from the same collection even: the Lush Cardigan. But again, body type and fit… grumble, grumble. After a bit of plotting, I decided that I wanted elements of the sweater, but not the exact sweater. I can do that. And if I hate it, I can just rip it out again and try something else again in 2 more years. ha!
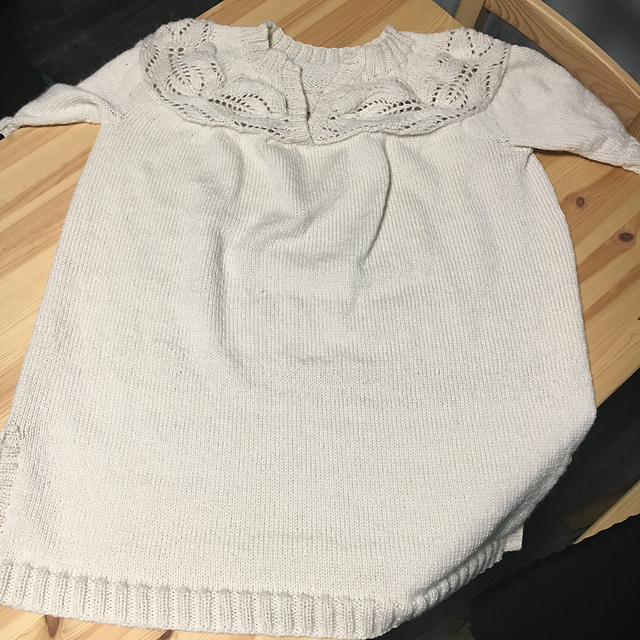
I have detailed construction notes on my project page in Ravelry, but the TL;DR of it is: I took the lace at the top, made it a V-neck pullover, increased the circumference to give it positive ease, then knit until it was long enough to wear as a tunic with leggings.
When I got down to the bottom, I decided I wanted a little less structure – a split hem was just the thing! BUT, a split hem meant switching from knitting in the round to knitting flat; this also likely meant a change in gauge (the size of the stitches) and required a change in needle size (so it didn’t look wonky). I wasn’t sure how I wanted to handle this, and I knew I would want to reinforce the spot where the front & back split and I wasn’t sure how to handle that either!
Then the solution came to me – why not steek it?!
(“steek” is knitter-speak for cutting your knitting.)
I hadn’t done a partial steek like this before, but I’d done a full steek on my Sugarleaf cardigan. This couldn’t be as intimidating as that! I also wanted to try securing my steek stitches on my sewing machine, and these little baby steeks would be perfect practice!
I designated certain stitches as ‘steek stitches’ in my sweater, knit to the length I wanted and bound the knitting off. Then I dug out my trusty swatch and dialed in my Singer sewing machine to test sewing into my knitted fabric.
After a few adjustments, I landed on this:

Tiny stitch length is key! My sewn stitches just disappeared, especially when I was between the knit Vs!
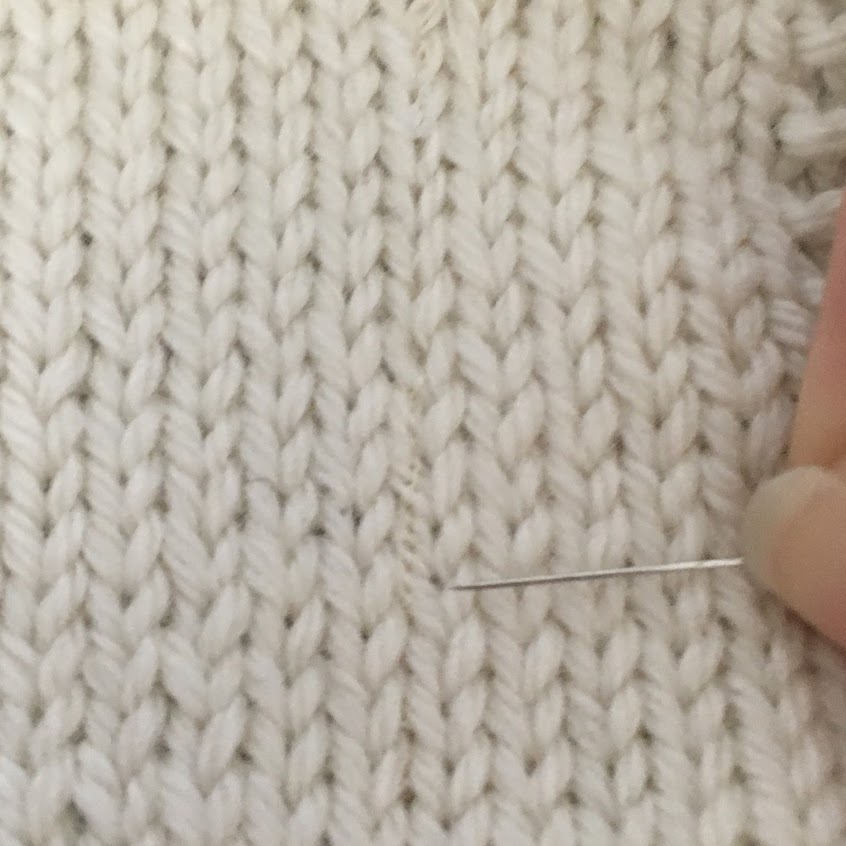
When zoomed back, it wasn’t noticeable at all. So I prepped some ribbon to sew onto my swatch.

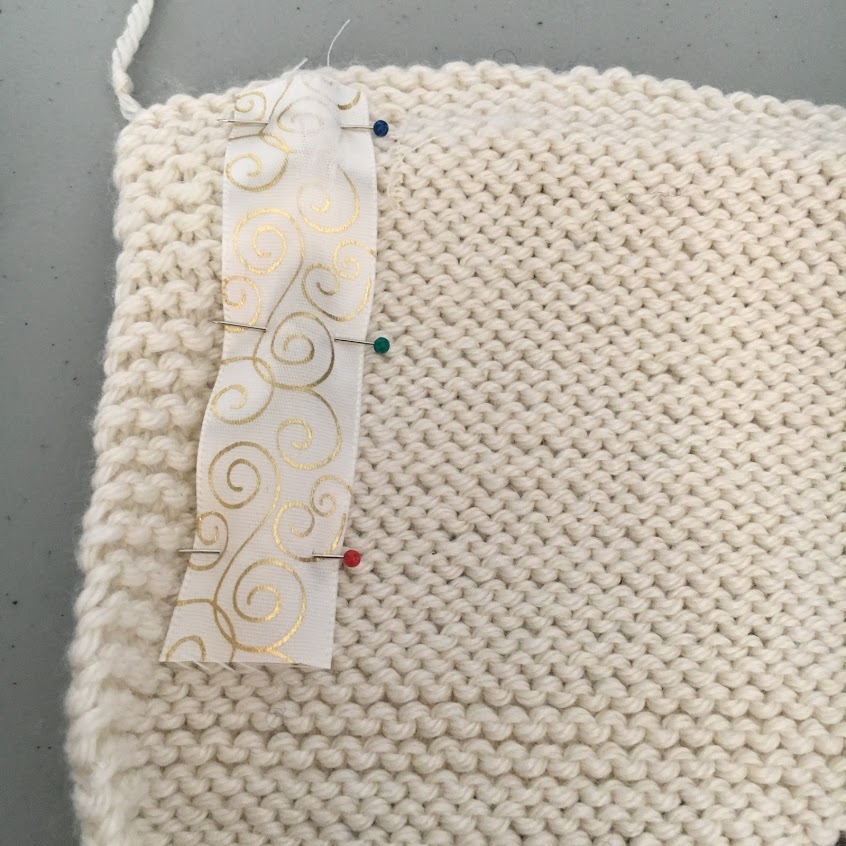
After I sewed that down, I mocked up the reinforcement for the split.
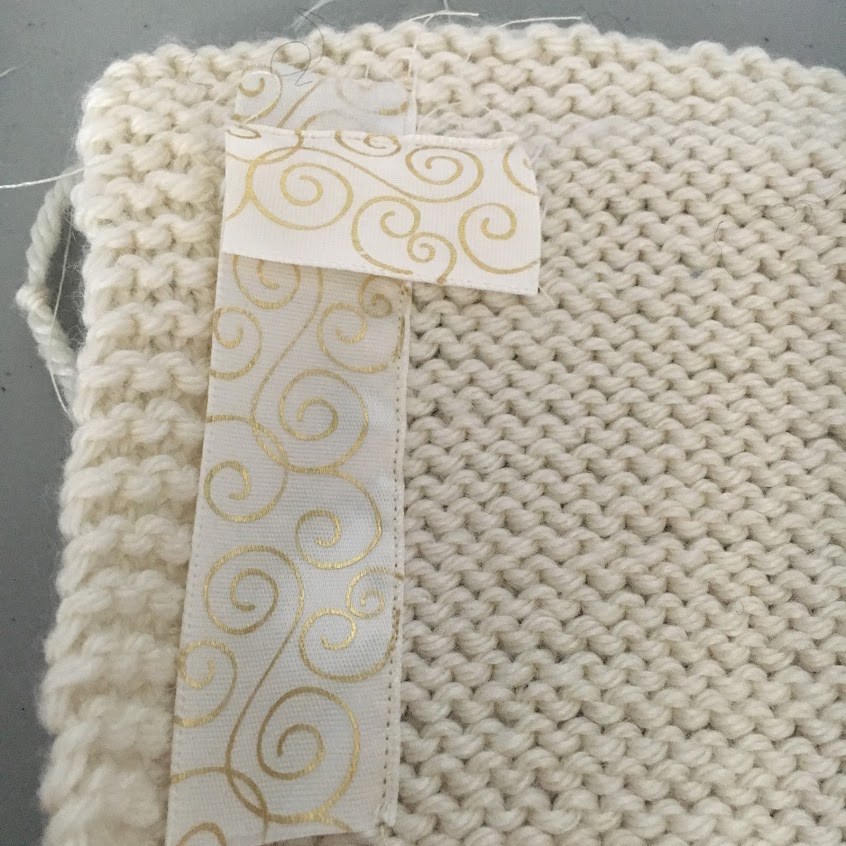
All good and practically invisible in the middle of the stitch!

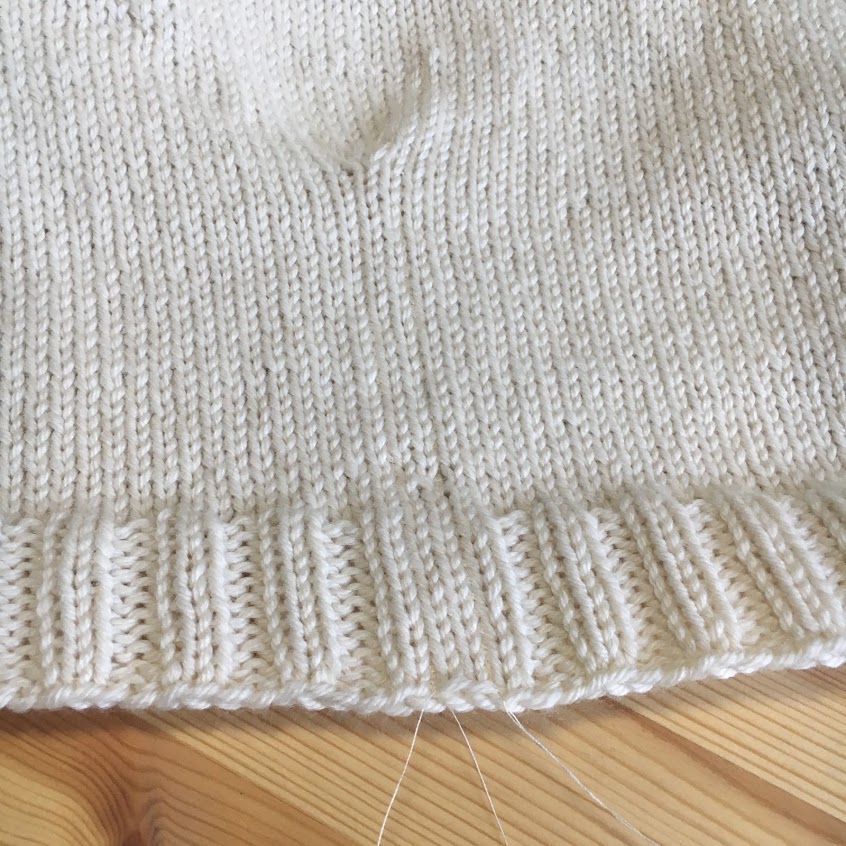
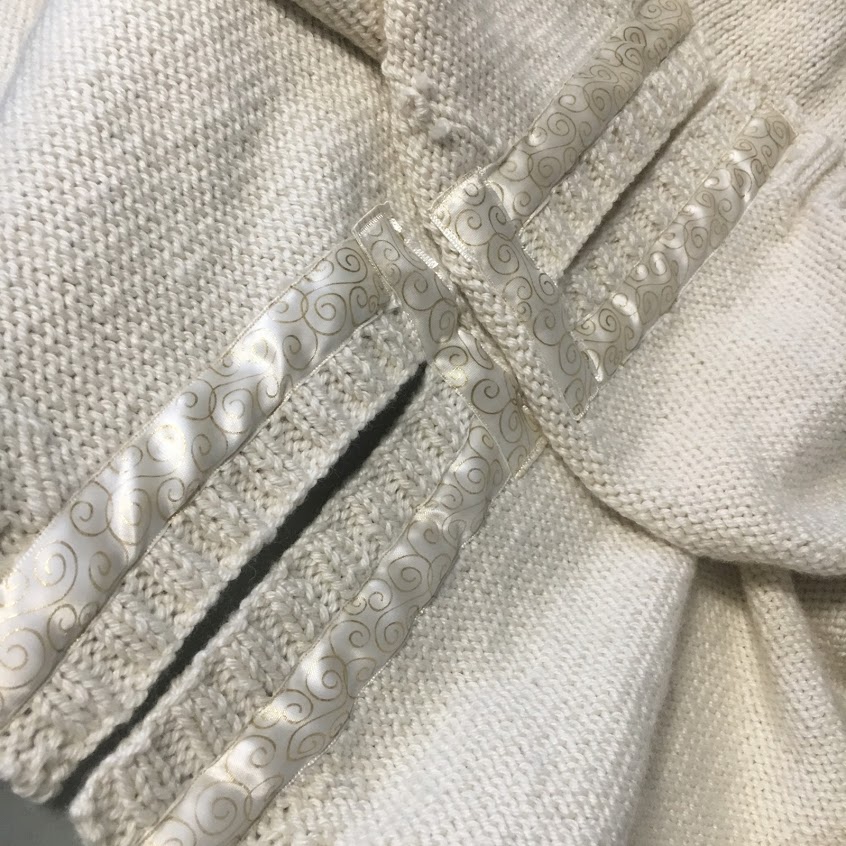
Next up was sewing & cutting the real thing! Here is the bottom of the sweater, with the sewn reinforcement in place:
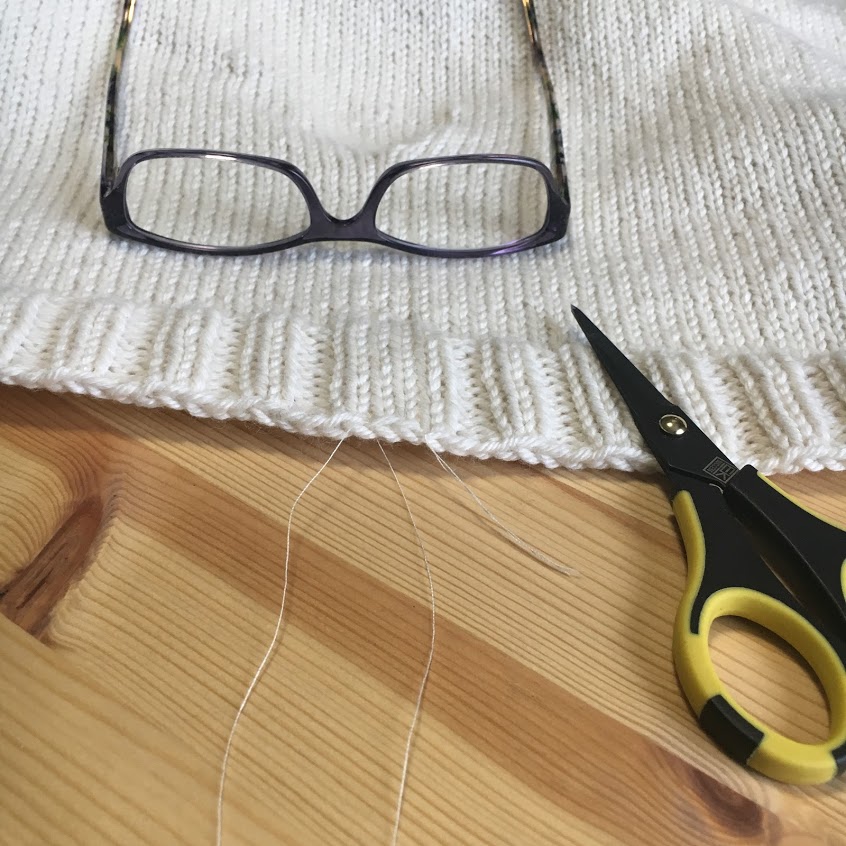
I turned on my brightest light, got the glasses on and carefully cut between my sewn reinforcements.
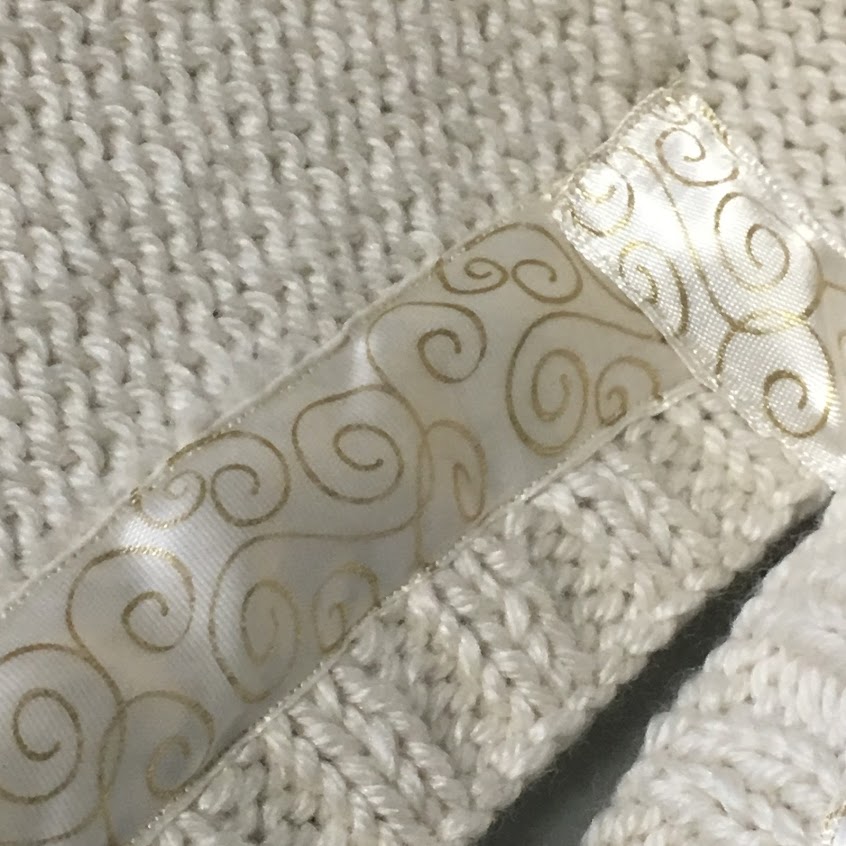
After the cutting, I picked up stitches for the ribbing just like I would a button band or collar. Once those were done, it was time to sew ribbon over the cut edges to help the ribbing keep its shape and protect the cut stitches from fraying (and really, keeping the fuzz off of everything else I own! I wasn’t concerned about the knitting unraveling at all.) .

I sewed both long sides down, then the top pieces last.
When all was said and done, I was very happy with the outcome.
I will definitely use a sewn reinforcement for steeks in the future. Give it a try! Take a little time to dial in your machine, test your swatch, sew slowly.
One tip – I found that there was an edge on the bobbin plate of my sewing machine that had never caught store-bought material, but did snag my swatch when I sewed it. So I held tissue paper under my knit fabric as I fed it through the machine to keep it from snagging. I didn’t intend to sew the tissue to the material, but the few times I did, it just peeled right off.
My completely improvised sweater is done and cozy and I love it! No takebacks!